Health & Fitness
Make Your Own Garden Tuteur
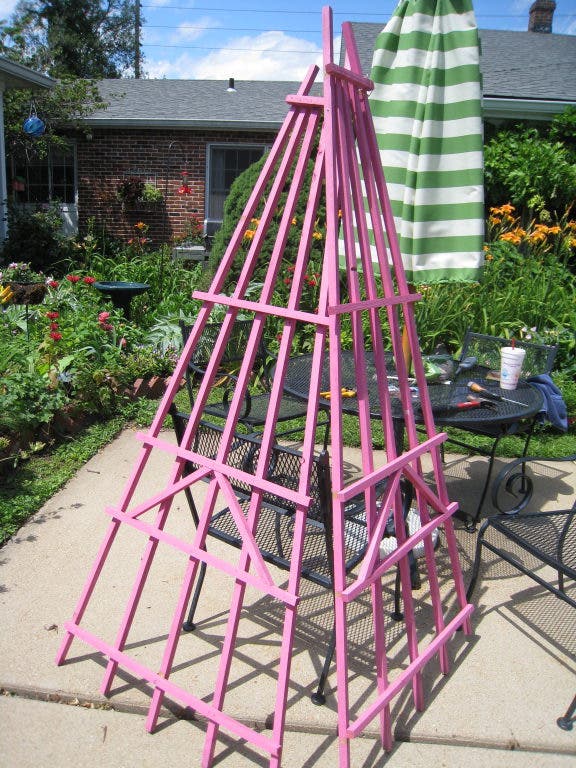
If you've got some spare time and a little pocket cash, you, too, can make a stunning tuteur for your garden.


I love garden projects. Especially those that give you a big bang for your buck and are simple to complete. If you’re shopping for an interesting garden accessory on which to grow climbing roses, clematis or morning glories, I have the project for you! The only tool you need is a wire cutter to trim some copper wire. The only items you will need are three pieces of trellis, a spool of wire and a few cans of spray paint. If you like things natural and the look of cedar, you won’t even need the paint!
First, let’s go shopping! Personally, I like the Lowe’s on Lindbergh in Kirkwood. That particular Lowe’s has such a huge, well-stocked garden department. They carry way more garden accessories, trees and shrubs than all the other guys. But I digress. You’ll need three trellises. Be sure to purchase the ones with straight sides. Some are curved, and you can’t make the top and bottom meet no matter how hard you try. Check them for damage and splitting. Some of the trellises offered are white plastic, plain cedar and white wood. I used plain cedar. I figured that the paint would seal the wood and give me years of enjoyment. Go to the section inside the store that has wire. You’ll find many colors and sizes - I chose copper. Don’t pick anything too thick. You’ll need to wrap it around the meeting corners, and the fit needs to be tight. Lastly, you’ll need spray paint. I used enamel specifically for the outdoors. Figure that you’ll need two to three cans of good-quality spray paint.
After I got the three sections home, I began spraying. If you’ve been saving large pieces of cardboard for a project, this is a happy day indeed! Put it to good use and lay the trellises evenly on the board. Shake the can and start spraying. The paint dries very quickly, but don’t be overeager to flip to the other side too soon. You’d hate to be spending your time pulling cardboard off your trellis. In addition, make sure it’s not a windy day - you don’t want more paint flying off into the atmosphere and not on your project! One final warning - if, like me, you go headlong into this project because you can’t wait to see the finished product, take heed. You will lose all feeling in your fingertip. I am not joking. My fingertip was totally numb for a day or two. And, yes, it was worth it.
Find out what's happening in Town And Country-Manchesterwith free, real-time updates from Patch.
You’ve painted the three trellises and can begin the final step: wiring them together. This is easiest if you have a helper. I didn’t, so I used my patio chairs. You will begin attaching the first trellis to the second. Take an 18-inch piece of wire and cut it. You may as well cut lots of them and save yourself the trouble of cutting it each time. Place the trellis parts together at the top and bottom of the frame. Wrap the copper wire diagonally in an “X” between the wood slats. This will bring the two trellises together. Repeat on the bottom of side #1 and #2. Continue in this manner, attaching each trellis to the other on the top, bottom and middle with the wire. You’re almost finished!
Have you decided where you’d like to place your masterpiece? Front and center, I hope! Now, you will need something to “plant” your trellis in the ground. I found some metal spikes with a flat top that I pounded into the ground, making sure that I wired the trellis leg to the spike. I’m sure there are many other ways to stake your trellis to the ground, possibly tent pegs or metal plant stakes bent in half. Just be sure to stake it, or it will sail across your yard in the next windstorm. You worked way to hard to have that happen, didn’t you!