Health & Fitness
Gardening 101: How to dig, Divide and Replant Perennials
When the weather cools is the best time to dig and divide your perennials. It's easy! I'll show you how!


The perfect time for adding to your collection of perennials is fall, when the air turns crisp. Keep your hard-earned cash in your pocket; all you have to do is head into the backyard and divide your overgrown perennials.
It’s super easy to make a huge hosta or daylily multiply into 4 or 6 new plants. Get your shovel and pruning saw- we’re off to dig and divide perennials!
The plant I’m dividing today is a hosta that the deer had their way with a few weeks ago. You’ll notice that the leaves are gone and only the stems remain. That doesn’t matter; in fact, it’s easier to divide plants when you throw caution to the wind safe in the knowledge that you won’t injure the leaves.
Find out what's happening in Town And Country-Manchesterwith free, real-time updates from Patch.
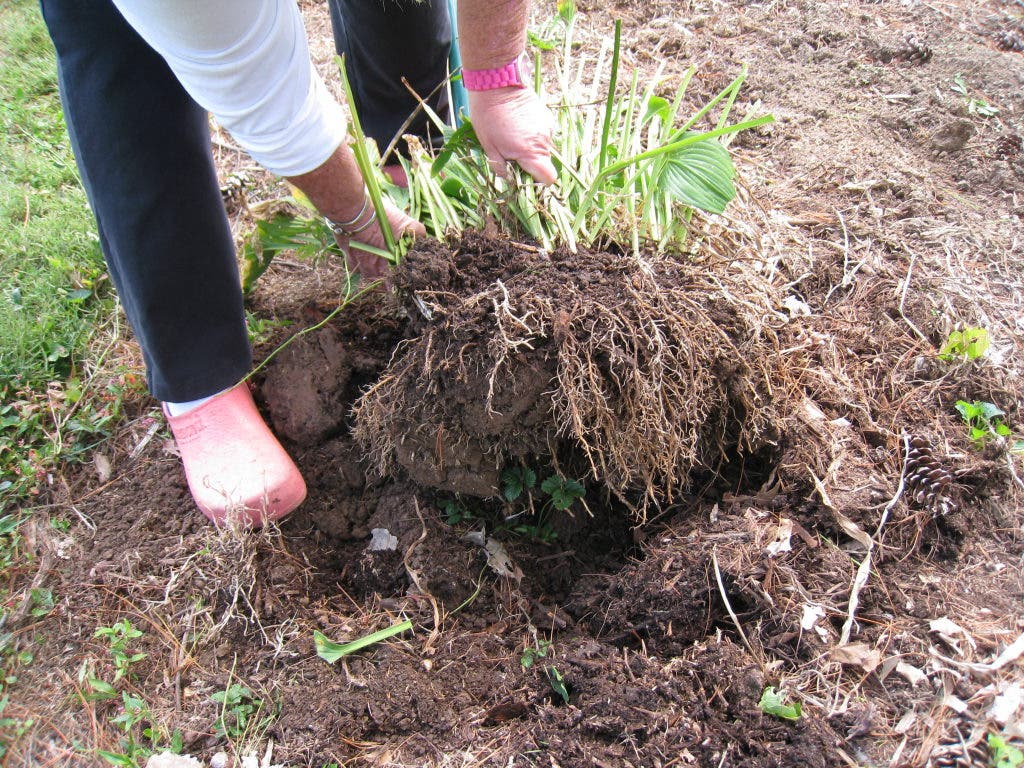
The very first step is to dig the entire clump of hosta out of the ground. This very same procedure works with other “clumping” perennials too. These include daylilies, phlox, most ferns, lily of the valley, daises and oh so many more.
Grab your shovel and begin digging around the clump you wish to divide. Dig a circle about 6” away from the outermost leaves. After you’ve dug the entire way around the clump, place your shovel under the entire mass and try to “rock” it out of the hole. If you’ve done a sufficient job digging around the clump, it should come free and pop out easily. If not, look under the clump to see if any roots are still attached to the soil.
Find out what's happening in Town And Country-Manchesterwith free, real-time updates from Patch.
It’s kind of like pulling your child’s first tooth. Wiggle it a little at a time and you’ll have success.
By now, you should have a huge hosta clump staring you in the face.
The next step is to divide the clump in half. A pruning saw or sharp shovel will do the job. I have chosen my trusty shovel because it has a nice, sharp point. Place your tool of choice in the center of the clump and begin sawing or stepping on your shovel. It takes just a few stomps on the shovel for the ball of hosta to break in half. Pat yourself on the back for a job well done- we’re almost to the finish line!
As you can see, the two clumps of hosta are still pretty big. It’s up to you how many more plants you want. I’d like to have 5 to fill in an empty spot, so that’s what I’ll shoot for. Let’s continue!
Turn the clump of hosta that has been cut in half and place the flat side on the ground. Get your shovel and place it on top of the clump. Now, using your foot, give a little shove. With minimal effort you’ll have 2 or 3 pieces. Keep working in this manner until you have the amount of hosta you’d like.
I must make one comment before we head off to the final step of this garden activity. Make sure that the pieces you have remaining are somewhat substantial in size. If you get 20 tiny plants from one big clump, it’s doubtful that they’ll become mature specimens in just one growing season.
I made the mistake of purchasing some inexpensive hosta and peony clumps online a few years back. They arrived, looking very small and having minimal roots. They survived, but it took a good 2 or 3 years to achieve blooming size. The general rule is that you don’t want to divide anything smaller than a child’s fist.
Now you have been blessed with many new plants that need new homes. The final step is to dig as many holes as you have plants.
If the hosta’s new home isn’t quite up to par, you can add straight compost, one of the compost/soil mixes or regular potting soil. Merely dig a hole about twice or three times the size of the clump you’ll be planting. Using your shovel, mix the soil amendments into the garden soil.
After you’ve thoroughly incorporated the new amendments with your regular garden soil, dig a hole the same size as your divided hosta. Be sure you plant it at the same level as it was in its previous home. Continue with the remaining pieces, making certain that they are planted at the correct height and far enough apart that you won’t be repeating this process sin a year or two.
Finally, you’ll want to water each division well. I find that it’s better to run your sprinkler on the recently planted additions for about 30 minutes. That way the water seeps in slowly, reaching all the roots without drenching them.
Smile, being happy in the knowledge that in 30 minutes you’ve made one plant become five plants. Your name isn’t Houdini, but you’ve preformed some garden magic nonetheless!